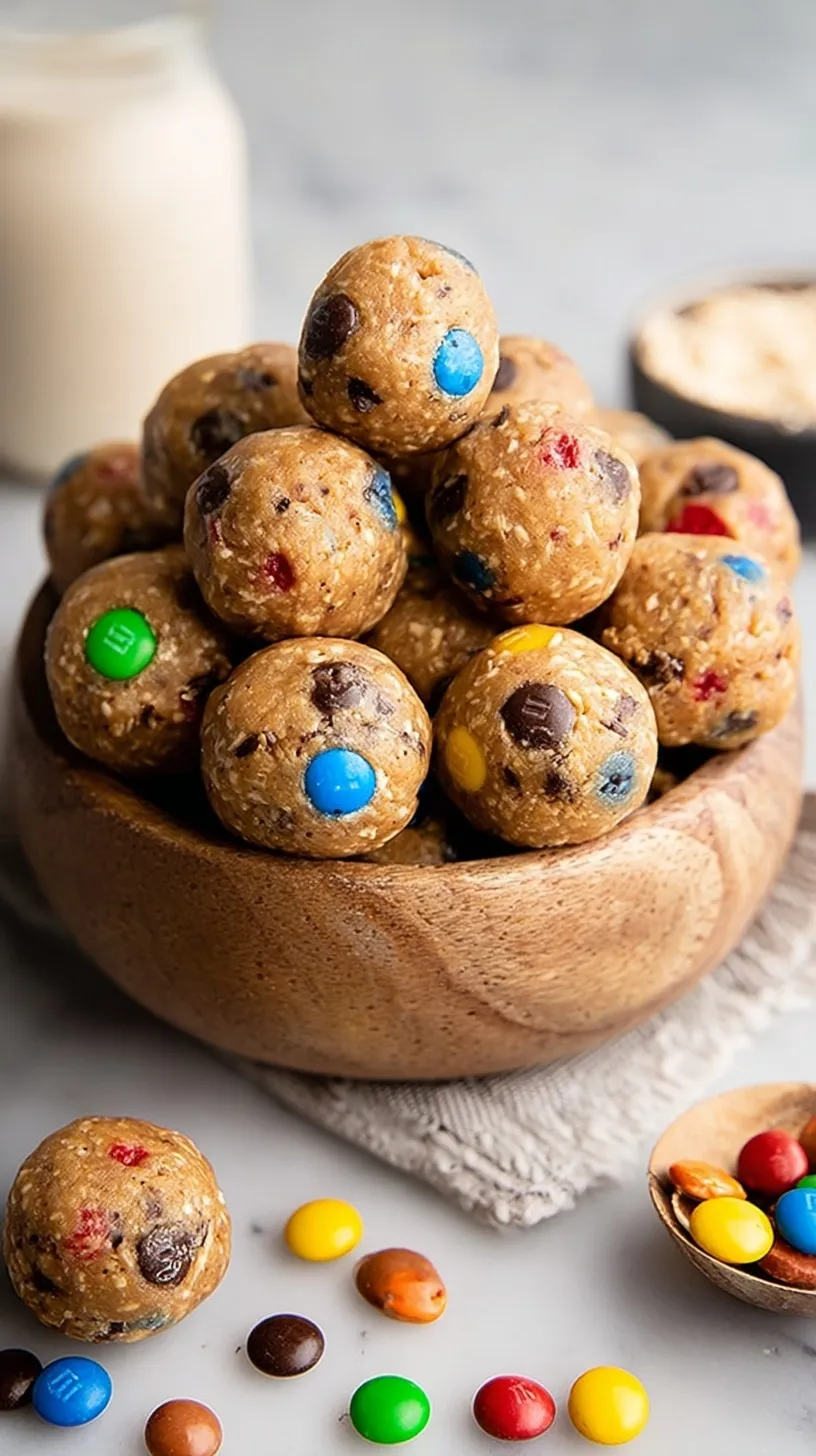
The crisp Fall air always makes me crave a cozy, satisfying snack. These Monster Cookie Protein Balls are the perfect solution for your busy school mornings. They deliver all the flavor of a classic cookie without any of the guilt.
You can whip these up in just fifteen minutes with simple pantry staples. They are designed to keep you fueled and focused throughout your day. Your whole family will love the colorful candies and creamy peanut butter center.
Why You’ll Love It
This recipe is a total lifesaver for your weekly meal prep routine. You do not need to turn on the oven to make these treats. They provide a balanced boost of energy whenever you need it most. The texture is perfectly chewy and satisfying for kids and adults alike.
You will appreciate how affordable these ingredients are at any grocery store. They stay fresh in the fridge for an entire week of snacking. It is the ultimate way to enjoy a healthy reset during the hectic Fall season.
The Easy Process
The method for these protein balls is incredibly straightforward and stress-free. You simply mix everything in one large bowl to minimize your cleanup. Using a silicone spatula helps you fold the dough with total ease. No fancy equipment is required to get professional results in your kitchen.
Simple Ingredients
- 1.5 cups old-fashioned rolled oats
- 0.5 cup vanilla whey protein powder
- 0.5 cup creamy natural peanut butter
- 0.25 cup honey or maple syrup
- 1 teaspoon vanilla extract
- 0.25 cup mini M&Ms
- 0.25 cup mini semi-sweet chocolate chips
- 1 tablespoon water (as needed for hydration)
- 0.125 teaspoon sea salt
Step-by-Step Directions
- Whisk the rolled oats, protein powder, and sea salt in a large mixing bowl until homogeneous.
- Introduce the creamy peanut butter, honey, and vanilla extract into the dry mixture.
- Fold the ingredients using a silicone spatula until a cohesive, tacky dough is achieved.
- Evaluate the moisture content; if the mixture is overly crumbly, incorporate water in 5ml increments until the dough can be compressed without fracturing.
- Incorporate the mini M&Ms and mini chocolate chips by hand, ensuring even distribution throughout the matrix.
- Divide the dough into 12 equal portions of approximately 30 grams each.
- Spherify each portion by rolling between the palms of the hands until smooth.
- Transfer the spheres to a parchment-lined container and refrigerate for 30 minutes to allow the oats to hydrate and the fats to stabilize.
Best Ways to Enjoy
Serve these bright bites as a colorful addition to any school lunchbox. They look beautiful arranged on a platter for an after-school playdate. Pair them with a cold glass of milk or a hot cup of coffee. These are the best kid-approved snacks for long car rides or sports practices.
Make-Ahead Advice
You can store these in an airtight container in the fridge for seven days. For longer storage, place them in a freezer-safe bag for three months. Simply let them thaw on the counter for ten minutes before eating. This makes them a reliable option for your busiest weeks ahead.
Pro Tips
- Don’t skip the chilling step as it helps the oats soften perfectly.
- Avoid using chunky peanut butter to ensure the balls hold their shape.
- Substitute sunflower seed butter if you need a nut-free school snack.
- Wet your hands slightly to prevent the dough from sticking while rolling.
- Use seasonal M&M colors to make these festive for any Fall holiday.
- Elevate the flavor by using a high-quality vanilla bean protein powder.
- Add the water very slowly to keep the dough from getting too sticky.
Easy Swaps
- Use maple syrup instead of honey for a vegan-friendly version.
- Swap the mini M&Ms for raisins if you want a refined sugar-free option.
- Try chocolate protein powder for an extra rich and decadent flavor.
- Add a pinch of pumpkin spice for a true seasonal Fall twist.
Common Questions
Can I make these ahead of time?
Yes, these are perfect for making on Sunday for the week ahead. They actually taste better after the flavors meld in the fridge.
What if my dough is too dry?
Simply add a teaspoon of water or extra honey to the mix. The dough should feel tacky and hold together when pressed.
Are these safe for school lunches?
These contain peanut butter, so check your school’s nut policy first. You can easily swap in WowButter or SunButter to make them safe.
I hope these protein balls bring a little spark to your Fall routine. They are so fun to make and even better to eat. Enjoy every bite!
— Emily
Ingredients
Method
- Whisk the rolled oats, protein powder, and sea salt in a large mixing bowl until homogeneous.
- Introduce the creamy peanut butter, honey, and vanilla extract into the dry mixture.
- Fold the ingredients using a silicone spatula until a cohesive, tacky dough is achieved.
- Evaluate the moisture content; if the mixture is overly crumbly, incorporate water in 5ml increments until the dough can be compressed without fracturing.
- Incorporate the mini M&Ms and mini chocolate chips by hand, ensuring even distribution throughout the matrix.
- Divide the dough into 12 equal portions of approximately 30 grams each.
- Spherify each portion by rolling between the palms of the hands until smooth.
- Transfer the spheres to a parchment-lined container and refrigerate for 30 minutes to allow the oats to hydrate and the fats to stabilize.