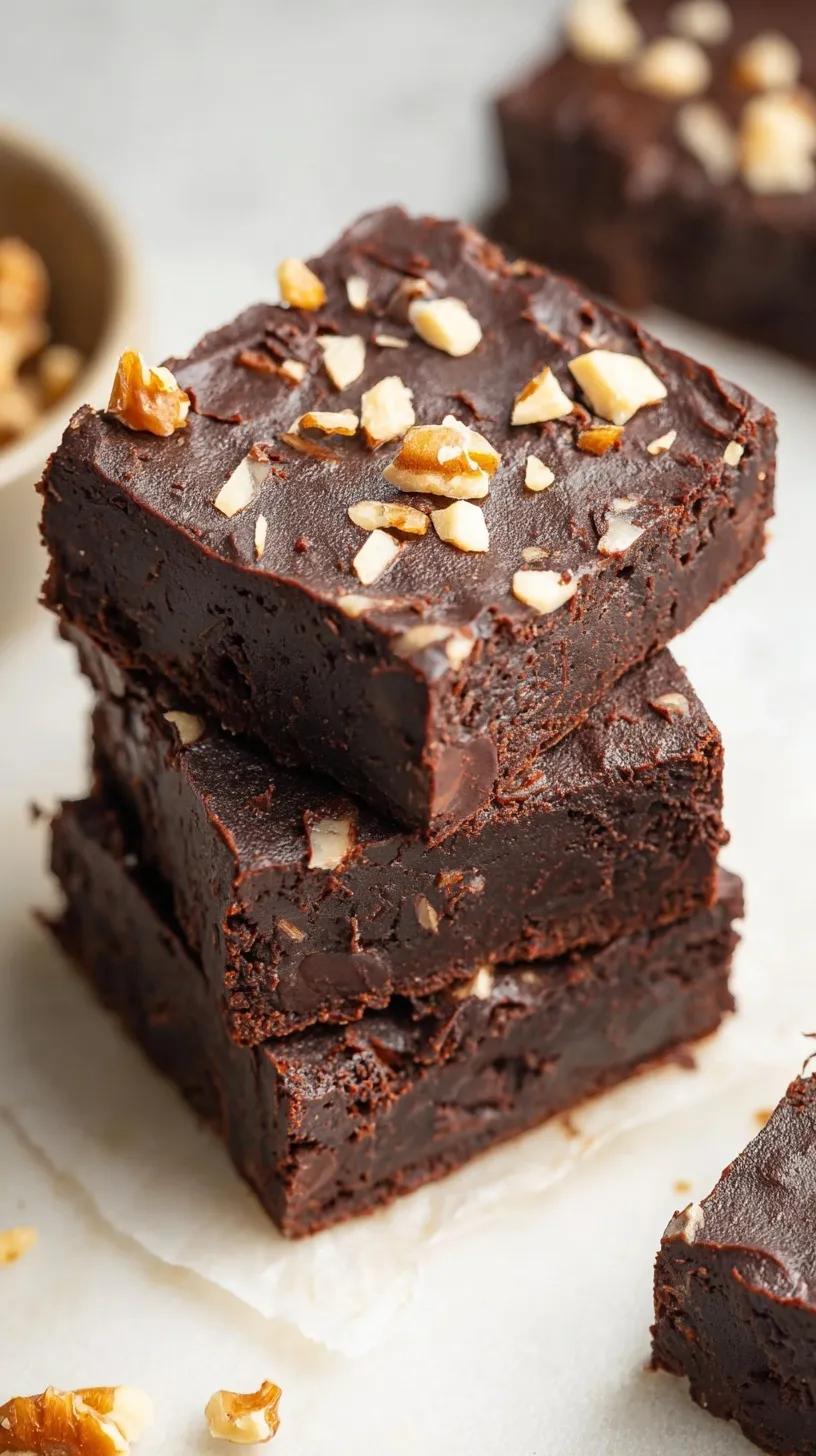
Are you looking for a guilt-free chocolate fix during your healthy reset? These brownies are the answer to your deepest cocoa cravings. You will never believe the secret ingredient is a simple can of beans. They are incredibly fudgy and rich without any refined flour at all.
This recipe delivers a decadent dessert experience that actually nourishes your body. It is the perfect way to satisfy a sweet tooth while staying on track. You can whip these up in minutes for a quick weekend treat. Get ready to fall in love with your food processor again.
Why You’ll Love These Fudgy Black Bean Brownies
These brownies are perfect for a nourishing snack or dessert. They pack a surprising punch of protein and fiber in every bite. You get all the indulgence of a classic brownie with better ingredients. Plus, they come together in just one blender for minimal cleanup.
The texture is dense, moist, and remarkably silky. You won’t find any dry or crumbly edges here. It is an affordable baking project using pantry staples you likely already have. Your family will never guess these are actually good for them.
The Easy Process
Your food processor does all the heavy lifting for this recipe. You simply blend the base until it is silky smooth and glossy. Then, you fold in the chocolate chips for extra pockets of melty goodness. It is a foolproof way to bake for any skill level.
Simple Ingredients
- 1 can (15 oz) black beans, drained and thoroughly rinsed
- 2 large eggs
- 1/2 cup unsweetened cocoa powder
- 1/2 cup pure maple syrup
- 1/4 cup melted coconut oil
- 1 teaspoon vanilla extract
- 1/2 teaspoon baking powder
- 1/4 teaspoon salt
- 1/2 cup semi-sweet chocolate chips
Step-by-Step Directions
- Preheat oven to 350°F (175°C) and grease an 8×8 inch baking pan.
- Place the rinsed black beans, eggs, cocoa powder, maple syrup, coconut oil, vanilla, baking powder, and salt into a food processor or high-speed blender.
- Pulse and blend until the mixture is completely smooth and no bean skins are visible.
- Stir in the chocolate chips by hand using a spatula.
- Pour the batter into the prepared baking pan and smooth the top.
- Bake for 25 to 30 minutes, or until the edges are firm and a toothpick inserted into the center comes out mostly clean.
- Allow the brownies to cool completely in the pan before slicing to ensure the texture sets properly.
Best Ways to Enjoy
Serve these treats slightly chilled for the ultimate fudgy texture. They pair beautifully with a handful of fresh, zesty raspberries. You can also add a tiny pinch of flaky sea salt on top. It is the perfect guilt-free treat for your next cozy movie night.
Keep It Fresh
Store your leftovers in an airtight container in the fridge for five days. They actually taste even better after a night of chilling. You can also freeze individual squares for up to three months. Simply thaw them at room temperature for a quick afternoon snack. Reheat in the microwave for ten seconds if you want them warm. Always ensure the container is tightly sealed to prevent drying out.
Tips for Best Results
- Rinse the beans thoroughly to remove any savory liquid or salt.
- Don’t skip the cooling time or the brownies may fall apart.
- Avoid overbaking to keep that signature fudgy, moist center.
- Use a high-powered blender to ensure no bean skins remain.
- Try this recipe during a healthy reset for a guilt-free win.
- Grease your pan well with coconut oil for an easy release.
- Add an extra sprinkle of chocolate chips on top before baking.
Make It Your Own
- Add a half cup of chopped walnuts for a crunchy texture.
- Swirl in a tablespoon of almond butter for a nutty twist.
- Use dark chocolate chips for an even richer cocoa flavor.
- Mix in a teaspoon of espresso powder to deepen the chocolate.
- Swap the maple syrup for honey if you prefer that flavor.
Common Questions
Can I really taste the beans?
No, you cannot taste the beans at all. The cocoa and vanilla completely mask the flavor. The beans simply provide a dense, fudgy structure.
How do I know they are done?
The edges should look firm and slightly pulled away from the pan. A toothpick should come out with just a few moist crumbs. Do not wait for it to come out perfectly dry.
Are these brownies kid-friendly?
Absolutely, kids love the rich chocolate flavor and soft texture. They will never suspect they are eating protein-packed legumes for dessert. It is a total parenting win.
I hope these brownies bring a little sweetness to your healthy journey. They are proof that nourishing food can still be incredibly delicious. Happy baking!
— Emily
Ingredients
Method
- Preheat oven to 350°F (175°C) and grease an 8x8 inch baking pan.
- Place the rinsed black beans, eggs, cocoa powder, maple syrup, coconut oil, vanilla, baking powder, and salt into a food processor or high-speed blender.
- Pulse and blend until the mixture is completely smooth and no bean skins are visible.
- Stir in the chocolate chips by hand using a spatula.
- Pour the batter into the prepared baking pan and smooth the top.
- Bake for 25 to 30 minutes, or until the edges are firm and a toothpick inserted into the center comes out mostly clean.
- Allow the brownies to cool completely in the pan before slicing to ensure the texture sets properly.