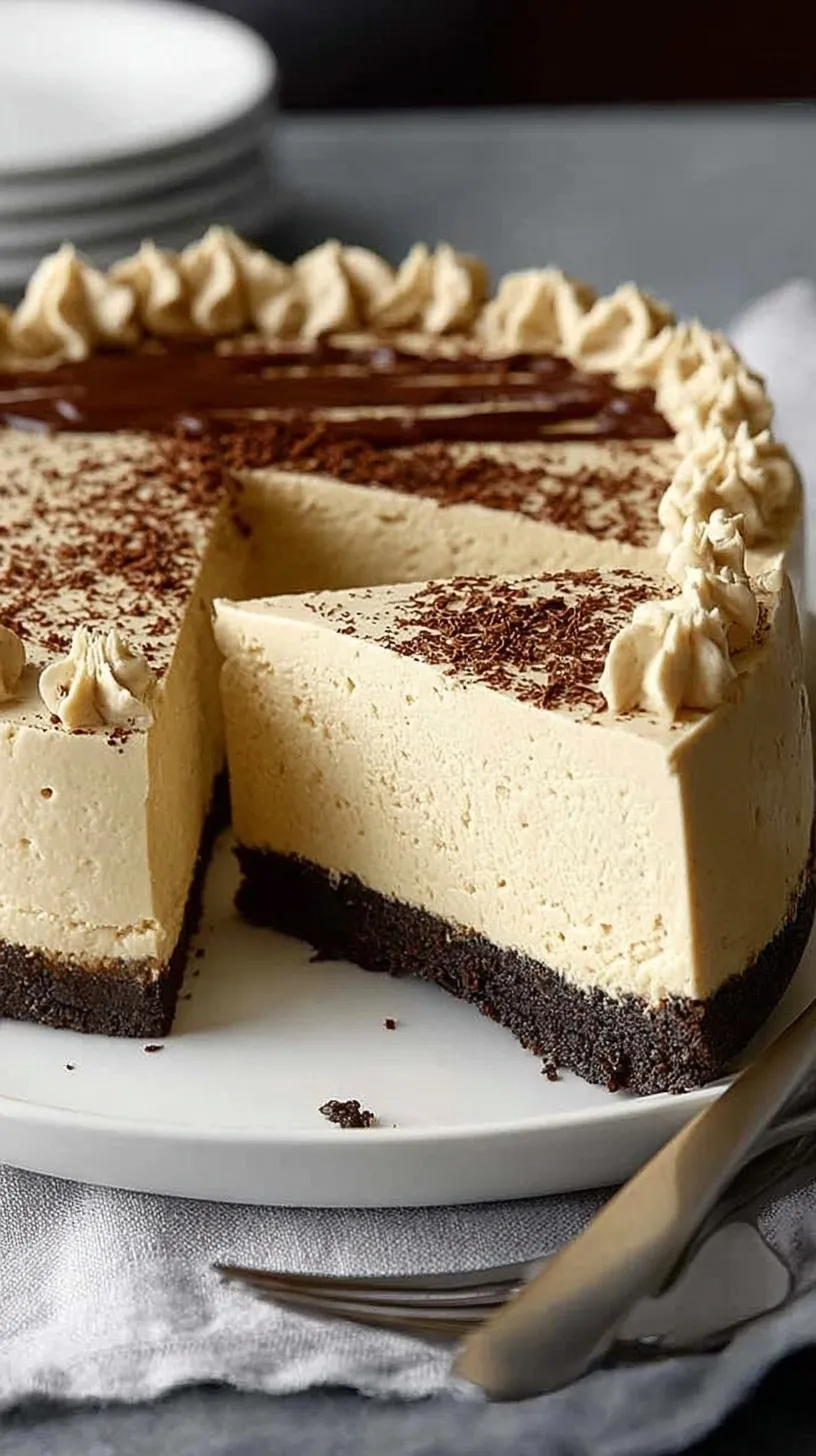
Summer mornings often call for an extra caffeine kick. Imagine getting that bold espresso flavor in a silky, chilled dessert.
This High Protein Coffee Cheesecake is your new favorite treat. It is creamy, refreshing, and keeps you feeling satisfied. You will love how easily it comes together today.
Why This Recipe Works
You can skip the oven entirely during these warm months. This recipe uses Greek yogurt for a tangy, protein-packed base. It feels like an indulgence but fits your healthy reset goals. You only need 20 minutes of active prep time. It is the perfect way to satisfy your sweet tooth.
The Easy Process
Making a cold-set cheesecake is surprisingly simple for beginners. You start by pressing a quick protein crust into your pan. The filling comes together in one large mixing bowl. Using gelatin ensures a perfect slice every single time. It is a foolproof method for a stunning dessert.
What You’ll Need
- 1.5 cups Graham cracker crumbs
- 30 grams Whey protein powder, unflavored
- 3 tablespoons Coconut oil, melted
- 8 ounces Low-fat cream cheese, softened
- 2 cups Non-fat Greek yogurt
- 60 grams Coffee-flavored whey protein powder
- 2 tablespoons Instant espresso powder
- 0.25 cup Water, hot
- 0.5 cup Granulated erythritol or stevia sweetener
- 1 teaspoon Vanilla extract
- 7 grams Unflavored gelatin
Step-by-Step
- Combine graham cracker crumbs, unflavored protein powder, and melted coconut oil; press into the base of a 9-inch springform pan.
- Dissolve instant espresso powder in hot water and set aside to cool.
- Hydrate gelatin in 2 tablespoons of cold water, then heat briefly until liquefied.
- Beat softened cream cheese and Greek yogurt together until no lumps remain.
- Add sweetener, vanilla extract, coffee-flavored protein powder, and the cooled espresso liquid to the base.
- Whisk the liquefied gelatin rapidly into the cheesecake batter to ensure even distribution.
- Transfer the batter onto the prepared crust and level with a spatula.
- Chill the assembly at 4 degrees Celsius for a minimum of 4 hours to allow the protein and gelatin matrix to set.
Best Ways to Enjoy
Serve this cheesecake chilled directly from the refrigerator. You can top each slice with a dusting of cocoa powder. It pairs beautifully with a fresh bowl of berries. This is a fantastic option for a high-protein afternoon snack. It also makes a wonderful light end to a summer dinner.
Keep It Fresh
Store any leftovers in an airtight container in the fridge. This cheesecake stays fresh and delicious for up to five days. You can also freeze individual slices for easy grab-and-go treats. Simply thaw a slice in the fridge for an hour before eating. Do not leave it at room temperature for too long. The gelatin base stays best when kept cold.
Tips for Best Results
- Don’t skip the gelatin hydration step to avoid lumps.
- Avoid using boiling water when melting your gelatin.
- Use room temperature cream cheese for a perfectly smooth texture.
- Whisk the gelatin quickly to prevent it from setting too early.
- Keep your cheesecake chilled until the very moment of serving.
- Run a hot knife under water for clean, professional slices.
- Choose a high-quality espresso powder for the best coffee flavor.
Make It Your Own
- Swap the coffee protein for chocolate for a mocha twist.
- Use almond flour crumbs for a gluten-free crust option.
- Add a swirl of melted dark chocolate on top before chilling.
- Try a peppermint extract during winter for a festive flavor.
Common Questions
Can I make this ahead of time?
Yes, this is an excellent make-ahead dessert. You should prepare it at least one day before your event. This allows the flavors to meld and the texture to set perfectly.
Can I substitute the gelatin?
Gelatin is essential for the structure of this no-bake recipe. You could try agar-agar as a vegan alternative. However, the texture may vary slightly from the original version.
Is this recipe family-friendly?
Absolutely, though it does contain caffeine from the espresso. You can use decaf espresso powder if serving to children. Everyone will love the creamy texture and sweet flavor.
I hope this chilled treat brings a little spark to your summer afternoons. It is the perfect balance of energy and indulgence for your busy week. Happy cooking!
— Emily
Ingredients
Method
- Combine graham cracker crumbs, unflavored protein powder, and melted coconut oil; press into the base of a 9-inch springform pan.
- Dissolve instant espresso powder in hot water and set aside to cool.
- Hydrate gelatin in 2 tablespoons of cold water, then heat briefly until liquefied.
- Beat softened cream cheese and Greek yogurt together until no lumps remain.
- Add sweetener, vanilla extract, coffee-flavored protein powder, and the cooled espresso liquid to the base.
- Whisk the liquefied gelatin rapidly into the cheesecake batter to ensure even distribution.
- Transfer the batter onto the prepared crust and level with a spatula.
- Chill the assembly at 4 degrees Celsius for a minimum of 4 hours to allow the protein and gelatin matrix to set.