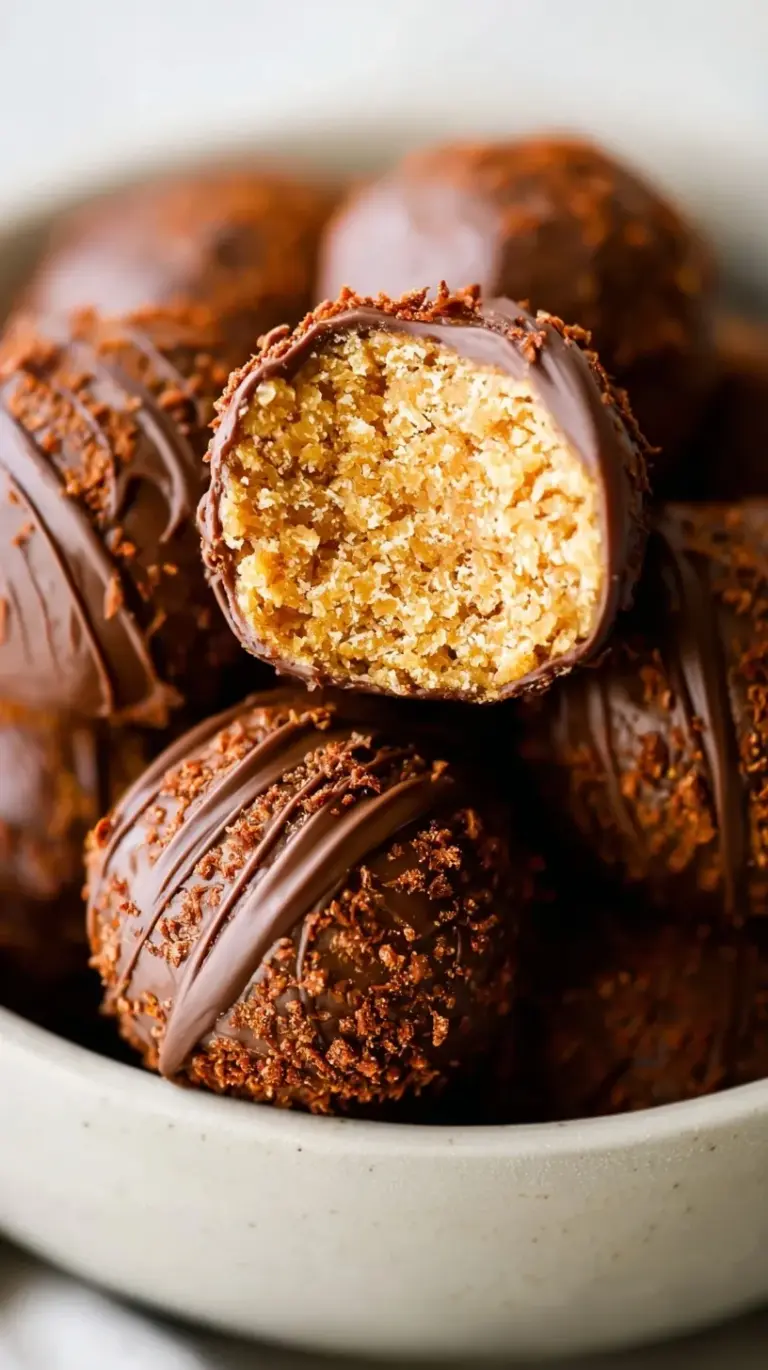
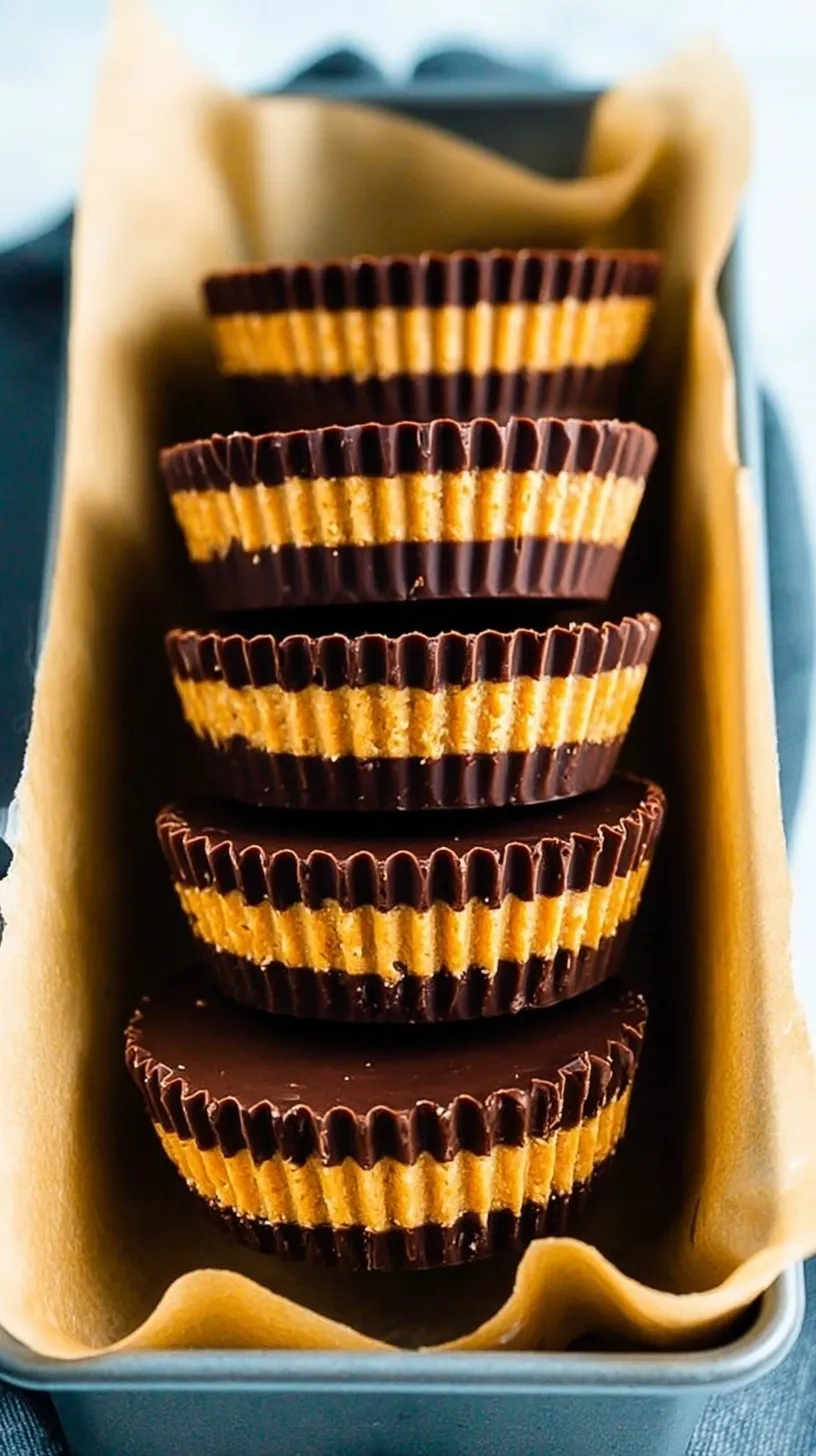
Do you ever crave something sweet but want to stay on track? These healthy peanut butter cups are the answer to your prayers. They fit perfectly into your healthy reset routine this season. You only need five simple ingredients to make them.
Making treats at home gives you total control over the ingredients. These cups offer a silky chocolate snap and a creamy center. You will love how easy they are to prepare. Let’s get into the kitchen and make some magic happen!
Why You’ll Love It
You will love how quickly these come together in your kitchen. They are much better than store-bought versions filled with sugar. Each bite is perfectly balanced and satisfyingly rich. You can whip them up in just 15 minutes of active time. They are dairy-free, vegan, and naturally sweetened with maple syrup.
The Easy Process
This no-bake method is incredibly beginner-friendly for any home cook. You will use your microwave to melt the chocolate smoothly. The freezer does all the hard work of setting the layers. No fancy equipment or baking skills are required for this recipe. It is a fail-proof process that yields professional results every time.
Ingredients List
- 1 cup dark chocolate chips (70% cocoa or higher)
- 1/2 cup natural creamy peanut butter (no added sugar)
- 2 tablespoons coconut oil, divided
- 1 tablespoon pure maple syrup
- 1/4 teaspoon flaky sea salt
Step-by-Step
- Line a standard mini muffin tin with 12 paper liners.
- Combine dark chocolate chips and 1 tablespoon of coconut oil in a microwave-safe glass bowl.
- Heat the chocolate mixture in 30-second intervals, stirring between each, until the texture is completely smooth and liquid.
- Spoon approximately 1 teaspoon of the melted chocolate into the bottom of each muffin liner and rotate the tin to ensure the base is evenly coated.
- Place the tin in the freezer for 10 minutes to allow the base layer to solidify.
- In a small mixing bowl, whisk together the natural peanut butter, maple syrup, and the remaining 1 tablespoon of coconut oil until a homogeneous paste forms.
- Remove the tin from the freezer and distribute the peanut butter mixture evenly among the 12 liners, placing it in the center of the chocolate base.
- Spoon the remaining melted chocolate over the peanut butter layer, ensuring the edges are sealed and the top is smooth.
- Sprinkle a small amount of flaky sea salt onto the center of each cup.
- Freeze the assembly for at least 60 minutes until the chocolate is firm and the center is set.
Best Ways to Enjoy
These treats are best served straight from the cold. They make a fantastic afternoon pick-me-up during a busy week. Pair one with a cup of herbal tea for a cozy moment. You can also pack them in a lunchbox for a surprise treat. They are great for sharing with friends who love healthy snacks.
Make-Ahead Advice
Keep these healthy peanut butter cups in an airtight container in your freezer. They will stay fresh and delicious for up to three months. You can also store them in the fridge for one week. The chocolate stays crisp and snappy when kept chilled. Do not leave them on the counter for too long as they soften.
Pro Tips
- Don’t skip the flaky sea salt on top for flavor.
- Avoid overheating the chocolate to prevent it from seizing up.
- Substitute almond butter if you have a peanut allergy.
- Use a mini muffin tin for the perfect snack-sized portions.
- Make these during your weekend meal prep for easy snacking.
- Elevate the dish by using high-quality 70% dark chocolate chips.
Easy Swaps
- Swap peanut butter for creamy cashew butter for a milder taste.
- Add a sprinkle of crushed peanuts for extra crunch.
- Try a seasonal twist by adding a pinch of pumpkin spice.
- Make them keto-friendly by using sugar-free chocolate and sweetener.
Common Questions
Can I make these ahead of time?
Yes, they are the perfect make-ahead snack for your freezer. They stay fresh for months if stored properly. Simply grab one whenever a craving hits.
What if my chocolate is too thick?
Add an extra teaspoon of coconut oil to thin it out. This helps the chocolate pour smoothly into the liners. It also creates a softer bite once frozen.
How do I know they are ready?
The chocolate should be completely firm to the touch. If the center still feels soft, give them more time. One hour in the freezer is usually perfect.
I hope these simple treats bring a little joy to your healthy routine. They are so satisfying and easy to keep on hand! Enjoy every bite.
— Emily
Ingredients
Method
- Line a standard mini muffin tin with 12 paper liners.
- Combine dark chocolate chips and 1 tablespoon of coconut oil in a microwave-safe glass bowl.
- Heat the chocolate mixture in 30-second intervals, stirring between each, until the texture is completely smooth and liquid.
- Spoon approximately 1 teaspoon of the melted chocolate into the bottom of each muffin liner and rotate the tin to ensure the base is evenly coated.
- Place the tin in the freezer for 10 minutes to allow the base layer to solidify.
- In a small mixing bowl, whisk together the natural peanut butter, maple syrup, and the remaining 1 tablespoon of coconut oil until a homogeneous paste forms.
- Remove the tin from the freezer and distribute the peanut butter mixture evenly among the 12 liners, placing it in the center of the chocolate base.
- Spoon the remaining melted chocolate over the peanut butter layer, ensuring the edges are sealed and the top is smooth.
- Sprinkle a small amount of flaky sea salt onto the center of each cup.
- Freeze the assembly for at least 60 minutes until the chocolate is firm and the center is set.