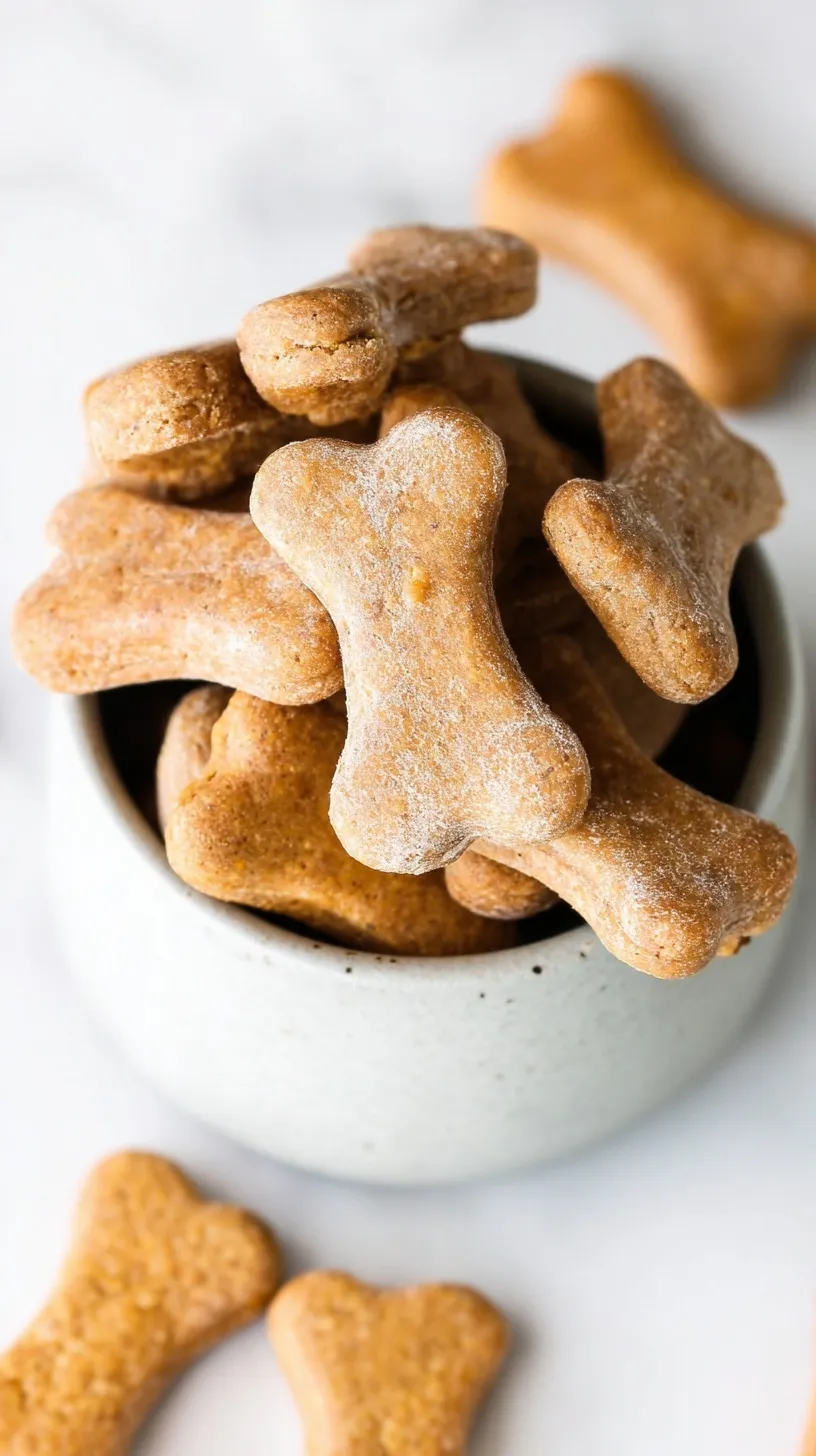
Your furry friend deserves the very best snacks every single day. You can make these Homemade Peanut Butter Dog Treats right in your kitchen. They are much healthier than any store-bought options you find. Your pup will definitely wag their tail for these crunchy bites. You likely have all the ingredients in your pantry right now. It is time to treat your best friend to something special. This recipe is perfect for a healthy reset for your pet.
Baking for your dog is a truly rewarding experience for you. You will love knowing exactly what goes into their food. These treats are packed with protein and fiber for good health. They are much more affordable than premium pet store brands. You can whip up a batch in under forty minutes total. Your kitchen will smell like warm nut butter and toasted grain. It is a wonderful way to show your pet some love.
Why You’ll Love This Recipe
Making treats at home saves you so much money over time. You control every single ingredient that goes into the mixing bowl. Most store brands contain fillers and strange preservatives you cannot pronounce. These treats are wholesome and simple for your dog to digest. You only need about thirty-five minutes from start to finish. It is a great weekend project for the whole family.
Your dog will appreciate the fresh flavor of real peanut butter. You will feel good about supporting their overall health and wellness. It is a win-win for everyone in your happy home. Budget-friendly snacks are always a smart choice for busy pet owners. You can easily double the batch to share with neighbors. These treats are perfect for any season or any occasion. Your pup will surely come running when they hear the jar.
The Easy Process
The process is very quick and easy for anyone to follow. You start by mixing the wet ingredients together until smooth. Then you gradually add the dry flour and a little water. The dough comes together into a nice and stiff ball. Rolling it out feels just like making holiday sugar cookies. You will feel like a professional pet chef in no time. Use a light touch with your rolling pin for success. The dough should be thick and sturdy for the best crunch.
Simple Ingredients
Gather these four basic pantry staples to get started right now.
- 2 cups whole wheat flour
- 1/2 cup creamy peanut butter (must be xylitol-free)
- 2 large eggs
- 1/4 cup water
Step-by-Step Directions
- Preheat the oven to 350 degrees Fahrenheit (175 degrees Celsius) and line a baking sheet with parchment paper.
- In a large mixing bowl, combine the eggs and creamy peanut butter, whisking until the mixture is uniform and smooth.
- Add the whole wheat flour and water to the peanut butter mixture.
- Stir until a stiff, cohesive dough forms; if the dough is too crumbly, add water one tablespoon at a time.
- On a lightly floured surface, roll the dough out to a thickness of approximately 1/2 inch.
- Use a bone-shaped cookie cutter or a knife to cut the dough into individual treats.
- Arrange the treats on the prepared baking sheet with at least 1/2 inch of space between each piece.
- Bake for 18 to 20 minutes, or until the treats are firm to the touch and slightly browned on the bottom.
- Transfer the treats to a wire cooling rack and allow them to cool completely to ensure a crunchy texture before serving.
Best Ways to Enjoy
Wait for the treats to cool completely before serving them. This ensures they get that perfect and satisfying crunchy snap. Serve them as a special reward for being a good dog. They are great for positive reinforcement training sessions every day. Your dog will love the rich and nutty aroma instantly. Pair them with a fresh bowl of cool water nearby. These are perfect for a fun trip to the park. You can pack them in a small reusable snack bag. They are the ultimate on-the-go pet snack for adventures.
Keep It Fresh
Store these in a glass jar on your kitchen counter. They stay fresh and crunchy for about one week. You can also keep them in the refrigerator for longer. This extends their shelf life to two full weeks easily. Freezing the treats is another great time-saving option for you. Just thaw and serve whenever your dog needs a snack. Make sure the container is tightly sealed to prevent moisture. Moisture is the enemy of a perfectly crunchy dog treat. Label your jar so guests do not eat them accidentally. They look just like delicious human cookies on the counter!
Pro Tips for Success
- Always check your peanut butter label for dangerous xylitol.
- Don’t skip the cooling rack for the most crunchy texture.
- Use a bone-shaped cutter for a professional and cute look.
- Dust your surface with extra flour to prevent sticking.
- Add a splash of water if the dough feels too crumbly.
- Bake until the bottoms are a light golden brown color.
- Use these treats for a healthy reset after the holidays.
- Share a small bag of treats with your neighbor’s dog.
Easy Swaps
- Swap wheat flour for oat flour for a grain-free option.
- Add a spoonful of pumpkin puree for extra vitamins.
- Mix in some finely shredded carrots for a colorful crunch.
- Try using almond butter if your dog prefers that flavor.
- Sprinkle in some dried parsley to help freshen dog breath.
Common Questions
Can I make these treats ahead of time?
Yes, you can freeze the raw dough for later. Simply thaw it in the fridge before rolling and baking. You can also freeze the baked treats for months. This makes it easy to always have snacks ready.
How do I know when the treats are done?
The treats should feel very firm to the touch. They will not be soft like a human cookie. The bottoms should be a light golden brown color. They will continue to harden as they cool down.
Is this recipe family-friendly to make?
Absolutely, kids love helping with the cookie cutters. It is a safe and fun way to involve them. Just remind them these are special snacks for the dog. They are perfectly safe for humans but not very sweet.
I hope your dog loves these crunchy treats as much as mine! They are such a simple way to show extra love. Happy baking to you and your furry best friend.
— Emily
Ingredients
Method
- Preheat the oven to 350 degrees Fahrenheit (175 degrees Celsius) and line a baking sheet with parchment paper.
- In a large mixing bowl, combine the eggs and creamy peanut butter, whisking until the mixture is uniform and smooth.
- Add the whole wheat flour and water to the peanut butter mixture.
- Stir until a stiff, cohesive dough forms; if the dough is too crumbly, add water one tablespoon at a time.
- On a lightly floured surface, roll the dough out to a thickness of approximately 1/2 inch.
- Use a bone-shaped cookie cutter or a knife to cut the dough into individual treats.
- Arrange the treats on the prepared baking sheet with at least 1/2 inch of space between each piece.
- Bake for 18 to 20 minutes, or until the treats are firm to the touch and slightly browned on the bottom.
- Transfer the treats to a wire cooling rack and allow them to cool completely to ensure a crunchy texture before serving.